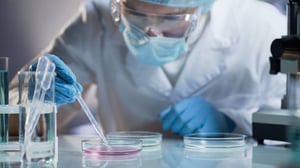
When working with primary cells you want to ensure their viability and recover the most cells from your vial. Here are some tips and tricks to storing, handling, and sub culturing your primary cells*.

HOW TO RECEIVE AND STORE PRIMARY CELLS
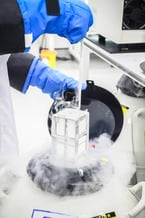
When your cryopreserved primary cells arrive, you will want to make sure they are still frozen. A quick and easy way to ensure your cells haven't been disturbed is by checking if there is still dry ice in the shipping box when it arrives. If everything looks properly preserved and you are NOT going to use the cells immediately, you can transfer your vials to storage in the vapor phase of a liquid nitrogen freezer.
Why liquid nitrogen? Cryopreserved primary cells can be stored in the liquid nitrogen vapor phase for more than 2 years with minimal loss in viability. It's important that storage remains at a temperature lower than -80°C (-112°F), if the vial reaches a temperature any warmer there will be a significant loss of cell viability.
HOW TO THAW AND PLATE PRIMARY CELLS
When thawing primary cells, you want to ensure their viability and recovery. In order to efficient culture your cells (the process by which cells are grown under controlled conditions), you'll want to follow the steps below.
Start by gathering your material. You will need:
- 37°C (98.6°C ) water bath
- Sterile pipettes and culture ware
- Pipette aid and micropipettes
- Trypan Blue Reagent
- Countess® or hemocytometer
- Incubator
Step 1: Prep Your Space
Prepare the basal media and supplements for your particular cells by following the product manual. Be sure to label and date all media bottles. Before handling the frozen cryovial, protect your hands and eyes. Proper personal protection is needed when you pick up the cell vial from the storage tank.
Step 2: Dip Your Cryovial
Promptly place the frozen cryovial into a 37°C water bath and submerge the lower half of the vial about 2-3 minutes to thaw the cells. Do not to wait too long; you should still see small ice crystals in the vial when you remove it. Wipe the outside of the vial with a disinfecting agent then transfer the vial to the tissue culture hood.
Step 3: Mix It
Using the 1 milliliter pipette, gently mix the thawed cells suspension. Do this by sucking the medium up and down the pipette.
Step 4: Separation
Remove 20 microliters from the vial and add this to a separate tube that contains 20 microliters of Trypan Blue Solution (a vital stain to selectively color dead tissues or cells blue).
Use the same 1 milliliter pipette to remove the remaining cells from the original cryovial and dilute into 4 milliliters of supplemented medium in a 50-milliliter conical tube. This process will then reduce the cells exposure to DMSO in the cryomedia.
Step 5: Calculate
Use a Countess® automated cell counter or hemocytometer to determine the number of viable cells per milliliter in the cryovial. As you’ve previously diluted the original cell stock, the calculated cell concentration should be divided by 5.
Step 6: Plating
Use the supplemented media you prepared earlier to dilute the cells to the recommended plating density. This is typically, 2,500 to 5,000 cells per centimeter squared. Possible plating density:
- 2,5000 cells/cm² = 1.25x10⁴ cells/mL
- 5,000 cells/cm² = 2.5x10⁴ cells/mL
When you plate the cells add your cell suspension to the culture flask:
- 5 mL of cell suspension to each 25 cm² culture flask (T25)
- 15 mL of cell suspension to each 75 cm² culture flask (T75)
Swirl the medium in the flask to distribute the cells evenly so they won’t grow in uneven patterns. Make sure to loosen the caps for effect gas exchange if you are not using vented filter caps.
Step 7: Incubate
Incubate your cells over night in a 37°C incubator containing a humidified atmosphere of 5% to 8% CO2. Do not disturb them for at least 24 hours after the culture has been started. The first medium change should happen 24 to 36 hours after starting the culture and again every 48 hours until 50% confluency is reached.
Once 50% confluency is reached, change the media every 24 hours until the culture is approxmitly 80% confluent. To avoid pipetting directing onto the culture surface when you are feeding cells, turn the flask on its side or invert it while pipetting. This feeding schedule promotes healthy mitotic culture.
It’s important that you do not let the cells overgrow because this can reduce cell growth and cause contact inhibition.
How to Subculture (or passage) primary cells
Once you’ve establish your primary cell culture, you might want to subculture or passage your cells. Just as you would when thawing your primary cells, gather all your materials in the hood, prepare the basal media supplements for your particular cells and label and date all media bottles.
What you'll need to subculture: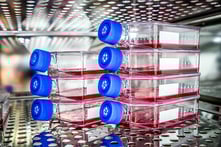
- Sterile pipettes
- 75 cm squared culture flask**
- Trypsin /EDTRA Solution
- Trypsin neutralizer
- Incubator
Before you can begin the subculture process, you should check your cells under a microscope to see that the confluency is about 80% and that there are mitotic cells present. If everything looks good to go, you may begin the subculture steps.
Step 1: Add Trypsin
Remove all the culture media from the flask and add 9 milliliters of Trypsin/EDTRA Solution. Be sure to rock the flask to cover the entire surface.
Step 2: Remove Trypsin
Immediately remove all the 9 milliliters of Trypsin /EDTRA Solution and add 3 mils of fresh Trypsin/EDTRA Solution.
Step 3: Incubation
Next you'll incubate the flash at room temperature until the cells have become completely round. This should take 1 to 20 minutes depending on the cell types and use of a coding matrix***.
Once the appropriate time has elapsed, inspect the flask under a microscope to confirm dissociation. If there are remaining adherent cells, you can dislodged them from the surface of the flask by simply tapping the flask gently.
Step 4: Add Neutralizer
Following detachment, add 9 milliliters of Trypsin neutralizer to the flask. It is important to not over Trypsinize your cells.
Step 5: The Transfer
Now you should transfer the cells to a 50 milliliter conical tube. In order to ensure all cells have been transferred, pipette another 9 milliliters of Trypsin neutralizer solution over the flask surface. This should remove any remaining cells. Add this solution to the 50 milliliter conical tube as well.
Step 6: Centrifuge
Centrifuge the cells at 180 g for 7 minutes. It is very important not to apply excessive g force. After allotted 7 minutes, observe the cell palette and then carefully remove the supernatant from the tube without disturbing the cell palette.
Step 7: Resuspend and Mix
Resuspend the cell palette in 12 milliliters of supplemented medium (or an appropriate volume depending on your application). Then mix the cells by gently pipetting them up and down with a 10 milliliter pipette.
Step 8: Seed
Determine the concentration of cells in the suspension and then dilute the cells in the supplemented medium and seed a new culture vessels at the appropriate density and return them to the incubator. Possible seeding density could be 2,500 to 5,000 cells per centimeter squared.
- 2,5000 cells/cm² = 1.25x10² cells/mL
- 5,000 cells/cm² = 2.5x10⁴ cells/mL
You’ve now subculture your primary cells and are ready for any experiment you would like to run. 
*While these tips apply to most cell types you should always refer to the product manual for your specific cell type.
**These instructions are suited for subculturing the cells in one 75 cm squared culture flask. If you want to use a culture vessel of a different size, you’ll need to adjust the reagent volume to match that format.
***Refer to the product manual for incubation times for your cell type.